Thursday, July 27, 2017

Merry Christmas Large Tag Card Assembly

Oversized 9 inch tag will serve as a card 
for a Christmas package or greeting. 
Card front has some lettering elements cut through 
to show contrast "liner", with liner-matched overlays 
that complete letters. 
Together they spell out "Merry Christmas" greeting. 
Small three-petal layered poinsettia flower with 
bottom layer green brachs can adorn the front 
(optional no punch tag shapes also included 
if you wish to leave the flower off). 

ASSEMBLY: 1. Identify and cut the shapes:
A card front with letter "tails" and 
other design shapes cut through
B contrast punch hole reinforcement
C contrast card base (1 or 2 shapes)
D add-on letter sections for "Merry"
E add-on letter sections for "Christmas"
F flower shapes: leaf base, 3 petal shapes
2. Layer the tag bases and attach together.
SUGGESTION: use a flat weight to help flatten
these shapes while drying to prevent warping
or curling, especially when using liquid adhesive,
here and throughout.
3. Place card front over base, with approx. .125"
offset all around, taking care to line up the punch hole
and flower brad hole openings.
4. Position and attach the "Merry" and "Christmas"
 letter sections next to the cut-out portion of that letter.
Here, the 'M' front leg is positioned and attached
to the left of the 'M' form, with top edges of "window"
and cut-out being positioned tucked together
so the edges line up.
5. Prepare the poinsettia flower accent by
layering the petal shapes, largest on the bottom
to smallest on the top, lining up
the punch holes of each.
Apply a dab of glue at center only as 
each layer is added.
Position the leaf shape underneath.
6. Position and attach the reinforcement ring
at the tag's punch hole.
7. Position the poinsettia flower over the punch hole
and attach with a dab of glue and 
a decorative mini brad.
8. Add ribbons through punch hole,
and the large tag card is ready to display
or to add to a special gift package.

HoHoHo Layered Card Assembly Guide

A central medallion with built-up layered filigree swirl overlay 
give this jolly holiday card dimension and elegance. 
Tiny Santa sleigh accent adds a touch of magic. 
Apply studs or jewels as desired. 
Card back has perforation near top to allow 
it to bend away to reveal message space. 
Measures approx. 5x7 when closed. 

ASSEMBLY: 1. Identify and cut the shapes:
A card base front   B card front accent panel
C card base back (with perforated top portion)
D medallion base (note this was changed in final sample)
E contrast medallion base for oval window show-thru
F medallion frame (2)
G medallion contrast for show-thru of side dot detail
H medallion front   I window oval trim
J swirl base   K swirl base contrast for show-thru
L swirl base front
M hohoho build-up base
N hohoho build-up individual shapes
O mini Santa with sleigh, reinforcement shape
2. Prepare the card base back by bending the upper
portion forward to form "hinge".
3. Position the hinge portion of card back
over the backside of card front, align edges
that match up, and glue the hinge portion
(above the perforation line) in place.
4. Position and attach the front card accent panel
with sides and lower edge offset at approx. .125".
5. Layer the medallion by positioning and attaching
the contrast shape over the build-up frames,
one at a time . . . 
. . .  taking care to match up all cut edge
as precisely as possible, here and throughout.
6. Position and attach the frame to the contrast 
base shape, then . . . 
. . . add the frame front, and the window oval.
SUGGESTION: Use a flat weight of some kind
placed on top of the glued-up shape to keep it flat
and prevent warping and curling,
particularly if using liquid adhesive.
7. Position and attach the medallion frame unit
over the offset medallion base.
8. Position and attach the medallion super unit
over the card front where the uneven offset will
be wider at top and side edges.
9.  Layer and attach the swirl shapes in order
from bottom upward as shown: swirl base (main color)
with accent layer next . . .
. . . and top layer (includes swirl highlight 
cut-outs to show contrast thru).
10. Position and attach (optional) hohoho/snowstar
build-up base, then individual hohoho shape
(shown here) with snowstars on top.

11. Position the swirl unit over the medallion window
so that it roughly follows the window oval frame,
and attach in place where the frame and
swirl backside touch.
12. Layer the mini Santa/sleigh accent with
its reinforcement build up shape, and attach.
13. Preview placement of the mini Santa/sleigh
over the lower front part of card to determine
where foam "riser" adhesive squares should be
placed, then position and attach them.
(Foam squares will support the lower/end portions
so that the shape is approx. on the same level
with the multiple layers of medallion and swirl build up.)

14. Position and attach the mini Santa accent
to the card front.
15. As desired, attach pearl, sparkle crystal,
or other studs at snowstar centers as can be seen
here in the finished sample.
Completed card.

Friday, July 21, 2017

Mama Kringle Card

Detailed folk-style figure of Santa's favorite lady, 
wearing festive dress and lacy pinafore 
presenting a swag of gingerbread men cookies, 
on an arched "iced gingerbread" base. 
Highly detailed and including many 
small cut shapes which layer onto 
face & hands fleshtone base. 
Arched base has back panel with upper perforation 
that allows it to hinge back to reveal message space. 
Fits into a 5x7 envelope. 

ASSEMBLY: 
1. Identify and cut the shapes:
A body silhouette base (shows thru face, hands)
with thumb tiny shapes near hands
B dress trim base     C dress main
D card front with zigzag icing trim
E card back base (with perforation near top)
F eye contrast (white) with tiny eyes (blue)
G holly leaves and berries left & right accents for hair
H hair base and hair accent
I face accents: nose overlay, cheeks,
mouth, spectacles
J sleeve overlays left & right
K pinafore overlay with strap zigzag &
berry dot accents
L collar ruff
M buckle, belt, pinafore apron
N shoe assemblies left & right;
buckle, shoe, shoe base (shows thru as heel),
shoe silhouettes (shows thru as hose)
O cookies rope
P gingerbread men cookies:
base, front, eye raisins, icing buttons,
red bowties
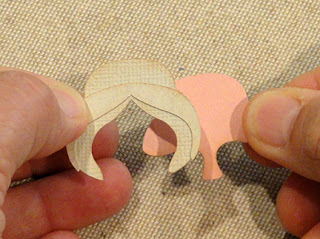
2. Position and attach eye contrast strip 
behind eye cutouts.
3. Layer hair base and overlay and attach to each other.
Position hair unit over nose overlay, matching
edges that align, and attach surfaces that touch.
4. Position and attach hair/nose unit on body base
as shown, matching portions of head and hair
contours that align.
5. Position and attach dress trim overlay
on body base, matching the edges that align.
6. Assemble the holly & berries hair accents
by first layering the smaller leaf accents onto
the larger silhouette bases, and gluing in place.
Then position and attach double berry base (left)
and finally single berry accents.
7. Position holly hair accents over assembly
where edges indicate, and attach.
Position and attach tiny eyes inside eye cutouts.
Position and attach mouth below nose edge,
cheek circles to each side of nose shape.
8. Position and attach spectacles at nose bridge.
9. Position and attach: pinafore over dress unit,
belt and collar over pinafore or dress where
edges match, "apron" over pinafore skirt
just below belt.
10. Position and attach the dress/pinafore
unit over the body/base unit.
11. Position and attach the pinafore straps
details (zigzag trim, berry dots), belt buckle.
12. Prepare hose/shoes, buckle units as shown:
a) layer shoe (green) shape over heel layer (brown;
b) position shoe/heel unit over hose shape (lt. gray),
then add buckle.
Complete left and right foot/shoe unit.
13. Position and attach sleeve shapes
over arm portions of figure assembly.
NOTE: foot/shoe units will not be attached
until figure unit is placed onto card front.
14. Position and attach zigzag icing onto
card front.
15. Prepare the card back shape by bending
forward the top portion above the perforation.
16. Position card back behind card front,
align all edges, then attach the top "hinge"
portion to front card backside.
17. Position and attach the figure unit
over the card front, matching the head shape
of figure to the head shaping at top of card front.
Make sure figure is straight and perpendicular
to the bottom straight edge of card.
18. Position foot/shoe units at center
bottom edge of figure, and attach in place.
19. Position and attach the "rope" that will
hold gingerbread men cookies.
20. Prepare three gingerbread men cookies
as shown:
a) center and attach body front onto
body base
b) position and attach raisin eyes,
body buttons, bowtie
21. Position and attach "thumb" shapes at upper/outer
edges of figure's hands.
22. Position and attach cookies along rope,
centering the first cookie, then positioning
side cookies evenly on left and right.
Here is the completed card.

Vintage Stove Shaped Card Assembly

Highly detailed kitchen stove evokes 
the feel of ol' time Christmas baking. 
Cut and layer details (compartments with panels, 
hinges, gauges, shelves, burner, footed base, 
side extension coal compartment and more) 
plus layered tea pot for a fun card for Christmas 
or for a favorite cook. 
Shaped offset front matches card back 
which hinges away to reveal message space. 
Fits into an A7 (5x7) envelope. 

ASSEMBLY: 1. Identify and cut the shapes:
A stove front silhouette to build on
B upper back base (show thru for accents)
C back mid assembly - frame, wall, tiny bar accents (4)
D top assembly - front panel, inner panel
E deck assembly - contrast for burner, deck, rim
F main front panel with bar accents
G left side door assemblies with contr, hinges
H large door assembly with handle, hinges, gauge
I side shelf assembly with overlay, drawer front, knob
J legs assembly with three-part contrast under-lay
K card base front    L card base back
M teapot assembly: grip, handle, base, knob,
show-thru accent, front
PLEASE NOTE: A is building silhouette;
K is card front
2. Assemble the deck by attaching the show-thru
contrast shape (top) behind the main deck strip
on the left end with edges matched, attaching
the rim strip at the bottom edge.
3. Position and attach the front panel below
the attached desk, matching left and bottom
edges that correspond.
4. Assemble the back mid section by layering
and joining the window shape with back panel.
5. Center assembly from step 4 at bottom
of upper back base, matching bottom edges.
NOTE that side "rims" will show.
Also attach tiny bar accents into their slots
(use a "Pick Me Up" tool if available).
6. Prepare the main front  and left side shelf 
details (doors, panels) as shown, placing 
lighter contrast shapes behind frame shapes,
attaching hinge shapes, handle, bar shapes,
layering circle gauge, drawer panel with circle knob.
7. Prepare legs assembly by positioning
and attaching the contrast shapes behind
the main leg shape. NOTE that the file includes
a single contrast shape as an alternative.
8. Position mid back panel onto silhouette base
above deck assembly.
Position top assembly above.
9. Fit each detail "door" into its window and
attach in place.
Position and attach side shelf with drawer panel.
10. Position and attach legs assembly at bottom.
11. Position and attach the completed front
silhouette onto the front card base, with
.125" offset margin all around.
12. Prepare the card base back by bending
the top "hinge" section forward at perforation line.
13. Position back base over backside of front base
with top edges aligned, and attach the "hinge" portion.
14. Assemble the teapot by layering the contrast shape
onto the silhouette/spout shape,
then position and attach front, knob,
(optional) handle contrast and grip.
15. Position the teapot on the deck of the stove
and attach.
Here is the completed vintage stove card.