Wing chair has multiple layer build-up for dimensionality,
including faux button tufting plus overlaid "rim" layers.
Front card base
holds upper two-layer banner that displays
words-cut message to "sit and
rest awhile".
Back card base has perforation to fold back
to reveal message space.
Rectangular layered pillow includes 'M's
plus center flower
(in place of O) to spell out 'MOM'.
Back offset layer bends back to reveal
message space.
Measures approx. 5.75" wide x 7.7"
tall.
ASSEMBLY: 1. Identify and cut the shapes:
A card front base B card back base
C chair back layer: shows thru as back cushion
D "tufting" lattice with buttons
E back "rim" shape
F arms build up (6)
G arms fronts with curlicues, accent buttons
H front "apron" I cushion (6)
J banner base K banner top layer with word cuts
L pillow base and top layers
M "M" letters plus dimensional flower


 5. Position and attach the "face" arm shapes
with their accent buttons to the arm build up unit.


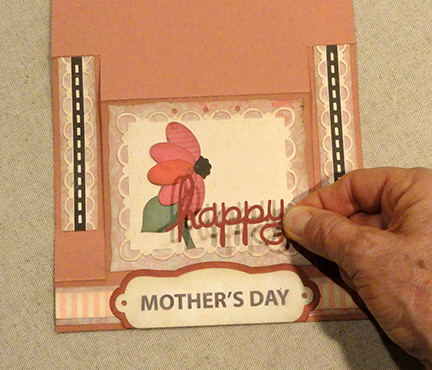
 8. Prepare to position the word cutouts
by marking a few strategic guide marks
with light pencil onto the top banner layer.
Here, the waste paper area around the word cut
is harvested, the bottom area trimmed away at
the letter bases (for banner edge visibility),
then centered side to side and up/down,
before using a .5mm mechanical pencil
to make light marks.
Attach the words in place as marked.

 10. Position and attach the chair unit
over the front card base with offset
at edges as shown here.

 13. Apply adhesive to the top portion of the
card back backside ONLY, then . . .


 Here is the final card, with card back
opened slightly to provide its own easel.

A card front base B card back base
C chair back layer: shows thru as back cushion
D "tufting" lattice with buttons
E back "rim" shape
F arms build up (6)
G arms fronts with curlicues, accent buttons
H front "apron" I cushion (6)
J banner base K banner top layer with word cuts
L pillow base and top layers
M "M" letters plus dimensional flower

2. Position and attach the chair tufting lattice layer
(with itsy-bitsy buttons attached at intersections)
over the chair back base
that shows thru as back cushion,
taking care (here and throughout) that all
corresponding edges - outer or interior- are
aligned with as much precision as possible.

3. Position and attach the back "rim" shape.

NOTE that here and throughout, as layers
are glued together for build up or unit assembly,
using LIQUID adhesive, it will be helpful to use
a flattening weight such as the fabric-covered
cast-off weight machine bar shown here,
(or many other equivalent household objects)
to help keep the assemblage flat, to avoid
warping or curling, until the glue is completely
cured.

4. Position and attach each of the 6 legs build up
shapes, taking care to align all corresponding
edges as accurately as possible.
(Use a flat weight to assist with flat drying.)

with their accent buttons to the arm build up unit.

6. Position and attach the arm build up/face unit
onto the chair back unit.

7. Position and attach the top banner layer
over the banner base layer.

by marking a few strategic guide marks
with light pencil onto the top banner layer.
Here, the waste paper area around the word cut
is harvested, the bottom area trimmed away at
the letter bases (for banner edge visibility),
then centered side to side and up/down,
before using a .5mm mechanical pencil
to make light marks.
Attach the words in place as marked.

9. Position and attach the banner unit
over the front card base at top with
edges aligned (no offset).

over the front card base with offset
at edges as shown here.

11. Position and attach the "apron" shape
between the arm face inner edges,
bottom edge aligned with arm build up.
12. Layer the cushion shapes with edges
aligned. When glue is dried, position and
attach in place above the apron shape.

card back backside ONLY, then . . .

. . . position the card front base over
the card back base, align edges, and
attach the upper portions together.

14. Layer the pillow shapes with offset edges,
hole punch aligned.

15. Prepare the flower shape by giving it some
dimensional shape.
Use a ball shaped tool or equivalent with soft mat
(McGill stylus tool - large - being used for sample)
to indent the face of the petals, causing edges
to curl upward.

16. Position and attach 'M' letters onto pillow
(use small guide cuts on pillow front
to assist placement),
then position and attach the hole edges
of flower to the pillow.

17. Position and attach the pillow in place above
the seat cushion.
NOTE that the pillow can fit between arm edges
in a straight-on placement, or . . .

. . . be angled for a more relaxes look.

opened slightly to provide its own easel.